
Some cards just feel better in hand. The weight of the paper, the slight ink texture, the way bold type meets subtle doodles. It all adds up to something that feels personal, not mass-produced. This Design It Yourself tutorial walks you through creating a handcrafted holiday card with a modern, yet nostalgic vibe. Think deep burgundy tones, chunky type, and just the right amount of whimsy for any end-of-year celebration.
Whether you’re celebrating Christmas, Hanukkah, or ringing in the new year, this design feels timeless enough to make anyone smile and festive enough to make it to their tree (if they still do that!).
Step 1: Download Your Assets
We’re using The Handmade Font Kit by Studio Funshop by Kelli (a Cyber-exclusive this week only), Holiday Vibes Hand Drawn Clip Art by venimo, Minimalist Christmas Cards Templates by Orca Design, and Hollyset: 25 Holiday Mockups by Salt Color Studio. These assets layer perfectly because they share a certain handmade aesthetic that plays well together.
Step 2: Open the Template in Illustrator
Launch Adobe Illustrator and open the file included in Minimalist Christmas Cards Templates by Orca Design. The setup is ready at 5×7 inches, a standard greeting card size that prints beautifully on thicker matte stock.
Step 3: Add Your Message
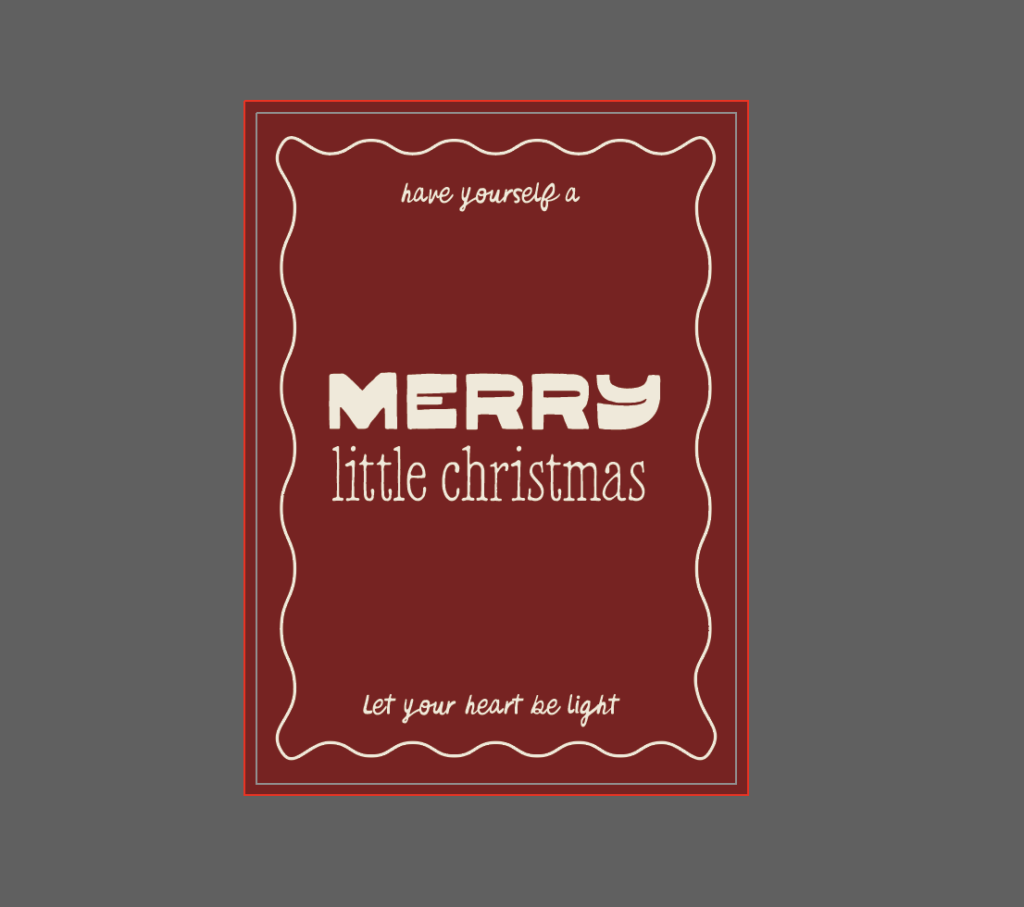
Now comes the fun part: typography. I used lyrics from a personal holiday favorite, “Have Yourself a Merry Little Christmas.”
Using fonts from The Handmade Font Kit, set each line in a style that establishes the right hierarchy and reinforces the word being mentioned:
- “Merry” gets center stage in Hello Quirkie, a bold, chunky face that carries weight.
- “Little Christmas” contrasts in lowercase Hello Softie, adding a hint of tenderness and reinforcing the sense of delicacy in this part of the song
- Supporting lines like “Have yourself a” and “Let your heart be light” are set in Hello Organic Hand, grounding the design with natural handwriting that feels like it’s part of the illustrations we’ll add in later
Step 4: Bring in Hand-Drawn Illustrations
From venimo’s Holiday Vibes Hand Drawn Clip Art, bring in a few line illustrations to frame your type. Go to Object > Expand if you’re using the stroked versions. This ensures clean scaling and prevents stroke weight distortion.
As an option, you can reduce or increase stroke width before expanding the object to harmonize with your typeface or layout. Wherever illustrations overlap with text, move them around to free up space.
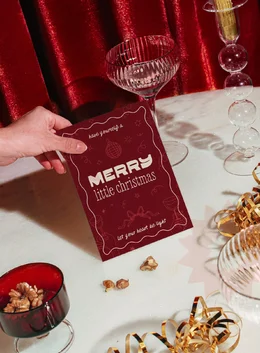
Since I’m using a disco-like ornament at the top, I bring party elements a bit closer to create a sense of celebration. I also play with sizing for the hands holding beverages, rotate them lightly, and create asymmetry by misaligning them. I rotate the ornament for an overall bouncier look too.
Step 5: Adjust Color and Balance
I now play with the background color to make it a tad darker shade of burgundy, and lower opacity on the illustrations to 70% to enhance text readability in white.

Step 6: Mock It Up
Finally, showcase your finished design in Hollyset: 25 Holiday Mockups by Salt Color Studio. The warm lighting, textured surfaces, and glass details give your card that just printed at a chic downtown stationery shop energy. The scene also emphasizes the funky retro vibes in our overall design.
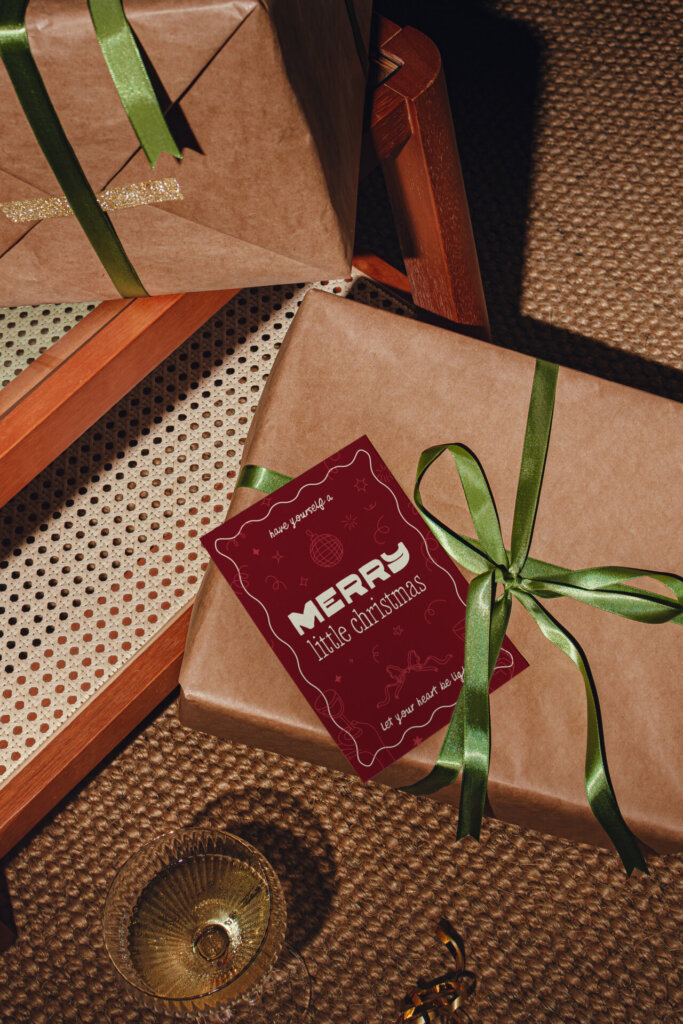
Whether you’re designing for clients, friends, or your own brand, this quick tutorial proves that handcrafted can also mean high design. Sometimes, all you need are the right assets and a few thoughtful details to make something worth keeping.

Download these worksheets and start practicing with simple instructions and tracing exercises.
Download now!


Brand strategist. Creating design tools to empower creative entrepreneurs. Author of the Lean Branding book. MA in Design Management from the Savannah College of Art and Design (SCAD).
View More Posts


